Saturday, November 22, 2008

Cold Weather Camping

Cold Weather Camping

            If done correctly, and if your prepared for it, cold weather camping can be even more enjoyable than during temperatures above 40 degrees. 

            The key to being comfortable in cold weather is to keep dry.  The moment that you become wet, the day can turn from fun and enjoyable to a death trap. 

            It all starts with the feet.  In all my experience camping, I have learned one thing for sure.  A person with un-happy feet is an unhappy person.  Keeping your feet is simple; all you have to do is follow a few rules that apply when camping in cold weather. 

            The first rule is to keep them dry.  A few simple steps will keep your feet dry through even the coldest and or wettest conditions that you may come across.  The first step is layering, though it may seem odd, layering clothing on your feet is one of the key components to keeping them dry, warm and comfortable.  However it turns out to make more sense than you may have realized.  Start with a thin pair of socks, I use silk socks.  These will wick any sweat away from your feet that may accrue while you are walking around and working.  Second will be your normal tennis shoe socks.  These will further pull any wicked sweat away from your foot.  The third layer is your heavy duty sock that will provide you with ultimate warmth.  If you are worried about water coming in through your boot I would advise taking a plastic bag and placing it between your tennis shoe sock (you may need to find a higher sock) and your thick sock.  The plastic bag will limit the breathability of your foot; however it will keep your feet dry from the outside.  This means that more attention will have to be paid to whether or not your feet are sweating.

            Layering the rest of your clothes is one of the more commonly known aspects of cold weather camping, or just plain old being in the cold weather.  However, some people may be layering incorrectly.  When layering the first think you need to think about is “what will bring moisture off of my skin”.  I find that the cold gear line that under armor makes does the job very well.  If you do not currently own any, it is not a problem, there is just a little more planning that needs to go into getting dressed.  First I would advise wearing any tight fitting under shirt.  Something breathable that will wick sweat away from your skin, not hold it in.  Many times people will come down with and or die of hypothermia not because they got wet from an outside source, but because their own sweat killed them.  If left unchecked your sweat will cook on your skin and sap the energy and life right out of you.  Now that an undershirt is on, the long sleeve shirts come into play.  One is usually enough however, if you are one that gets cold easily, it is ok to put two on.  After the shirts are on, it is time to begin putting on the clothing that will take the brunt of the cold.  I like to put a hooded sweatshirt on and then a fleece.  This allows me to access to the zipper of the fleece ion the event that I need to cool off to prevent sweating.  Having a hooded sweatshirt will provide you with the option of having another hood, or, the hood rolled up under your coat will protect the back of your neck from the cold.  If it is going to be super cold and windy where you plan to camp it would be wise to now put a light weight jacket over the fleece.  It will lessen the bite of the wind, keeping it out of the lower layers of your clothing, as well as act as another barrier between you and water.  Now you are ready for your outer shell, this can be any rugged jacket that is preferably waterproof.  Since this is your outer layer, something that is highly visible is greatly advised.  I personally own a Vertex jacket that is made by Columbia.  It is bright orange and grey.  Though the color will not keep you warm, it may just save your life if your body shuts down in the cold.  It will allow rescuers to see you much easier in a wintery expanse of white and black.

(To be continued with layering your bottom half)

Monday, November 17, 2008

Setting up a spread of decoys for a Goose hunt


Setting up a spread of decoys for a goose is an all sense of the phrase, an art form.  If it looks wrong, the geese will not land.  This entry will hopefully help you with the basics of setting up the spread.  The first rule is make sure that all of the geese are facing into the wind, or relatively facing that direction.  This is the first that will set the geese off that there is something wrong.  Next is do not set up the entire spread so that they are all doing the same thing.  Think of your spread of a college lecture, some people are sleeping, some people are eating, and some are paying attention, and these people are all intermixed throughout the group.  Knowing that, realize that the goose is in a survival situation so there is some order to chaos.  Generally speaking the Sleepers are on the inner part of the flock.  This is because they aren’t paying attention to not getting eaten by predators so they stay on the inside to be warned by the outer birds.  The outer part of your spread should consist of Sentry birds.  These birds are on the lookout for predators (such as yourself) so it is imperative that you get them right.  There should usually be one sentry per 8-10 geese in your spread.  The rest of your spread should consist of feeding birds and be sure to space the birds out unevenly if your spread looks like a grid of dots from the sky it will look fake.  Lastly is the shape of your spread, it should be an oval that is pointed into the wind and in heaviest on the edge that the wind is hitting.

Why do Geese Honk?


While goose hunting you may often find yourself hearing the birds before you actually see them.  Myself being the kind of person that loves to ask questions, I would often find myself wondering “why do they honk while in a large formation?” while they were homing in on my spread of decoys.  I now have the answer; the honk is a locator call that the geese use to “see” where everyone is in the formation.  It is used to coordinate the change in lead bird when one gets tired, as well as when a bird falls behind.  It is also used before the geese are about take off the flock is brought together and it takes off as one unit.  Contrary to popular belief and countless leadership lessons, geese do not honk to encourage the other geese to keep flying.

Why do Geese Fly in a "V" Formation?


            As a little kid I was always so interested in why and how geese knew to fly in a “V” formation.  I used to ask questions like why did they pick the letter V, and how do they even know what a V looks like? 

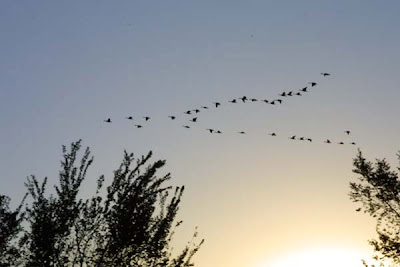
            After learning a little bit about physics I can now answer the age old question of “Why do Geese fly in a “V” formation?”  The answer is, because when they fly in a V formation they can fly over 50% further than any one goose flying alone.  The truth is that the goose understood aerodynamics hundreds of years before people even started to think about physics.  The goose instinctively knows to fly in a V because it’s easier, don’t people always take the easiest and fastest rout?  The goose does this also, when geese fly in a V formation there is only one goose that is flying head on into the wind.  That bird is the head bird, as it flies. air currents are created behind it.  The outer air current from the outer top of the wing is used by the bird flying behind it to increase the amount of lift that the bird receives with each flap of its wings.  As this happens the birds span out in the shape of a V.  Then when the lead bird gets tired it drops back to the end of the V and the formation shifts up a new lead bird.  

Saturday, November 8, 2008

Belay devices


    The first step to learning to climb on your own is learning to belay.  Well this post won’t necessarily teach you how to belay but hopefully by the end you may know a little about the equipment used to do it. 

            The first and most basic belay device is in fact, no belay device at all.  This is called the hip belay.  It is the oldest way to belay, however it is not the safest.  This type of belaying is used when the climbing routs are easy and a quick belay is necessarily.  The belay is done by simply feeding the rope behind you.  In the event that the climber slips or fails, the friction between you and the rope is that locks the rope.

            A Sticht plate is one of the oldest known belaying devices.  It is the simplest of all the devices and is probably the cheapest.  It consists of a plate of metal with a slot cut in the middle of it.  Rope is fed through the slot and down through a spring.  The rope then goes under a carabineer and back up and out of the plate.  The rope locked off by pulling the trailing end down to your hip.  This put a “bite” in the rope and prevents it from sliding back through the plate. 


             The ATC is perhaps the most common of all belay devices.  It stems from the Sticht Plate; it is just greatly improved upon.  As shown below, the device has two slots and a piece of wire going from one side of the device to the other.  This wire is what holds the device to the belay harness.  To use this device the rope needs to be pinched and pushed into one of the slots just as in figure one.  Then the device is clipped into the harness on a locking carabineer as in figure two.  Now the device is safely attached, how to break with the device is shown in figure three.  There are many variations of this belay device, these include the Variable controller; this has one side that is angled and thicker so that it may apply more friction which is useful when using smaller diameter ropes. 

Figure one

Figure two


Figure three

The next device is a figure eight device.  Though this is technically a defined as a belaying device used in climbing, nine times out of ten it is used for rappelling.  This device gets its name from its shape; it looks like the number “8”.  The rope may be fed through the device in two different ways.  The first way is up through the big hole, then down and behind the device then back up the big hole following the way that the original path of the rope.  The second and safer way is slightly different.  The beginning is still the same, come up through the big hole however this time instead of going behind the device, go through the locking carabineer, then back down through the big hole.  Feeding the rope through this way prevents the rope from sliding down off of the belay device when an excessive amount of slack is in the rope.  This would be extremely dangerous if the climber fell at this point because it is nearly impossible to catch them by locking off the rope.  They will fall and you will get a rope burn that you will not forget (the rope burn is only in the event that you are not wearing gloves).  A variation of this belay device is the rescue figure eight.  It is the same as the regular figure eight however it has wings that come off the sides to create extra friction and they stop the rope from sliding off of the device.

Figure eight

Rescue figure eight

Saturday, November 1, 2008

Building a fire


I can remember being in boy scouts and first learning how to build a fire.  I was about 12 years old and I was doing it with a friend.  It was so hard; I just couldn’t get it right.  I had tried the “teepee” method probably about nine times and every time it would get going then burn up the tinder and go out.  My scoutmaster then showed me a way to build the fire that has worked every time since.  Start out with two large logs and lay them side by side with about eight inches between the two crests of them.  Then look for sticks anbout the size of a match stick around and lay them across the two logs till there is about 6 inches if width between your first and last stick ( like this |<6>| )  then lay the same size sticks across those so you form a grid like this #.  Now look for sticks about the size of a pencil and do the same crisscrossing two layers on top of this.  Then find sticks about the size of your thumb and lay them across in the same way.  Now take one match and light the fire from the bottom.  If your wood is dry and you have followed the methods that I have stated above, you should have a full blown fire shortly.  I have not once had this method fail and I have always used just one match when starting the fires. 

                Now that you can build a fire it would be helpful to know how to build a fire so that it can be used for cooking.  You could just build the fire like I stated above and let it burn down and then set your pots or pans on top and cook.  However this method requires that you can find logs of equal size and that you wait for the fire to burn down to just coals.  The alternative is a pit fire.  Dig a hole about one food deep and build your fire in it.  Once your fire gets going throw your wood into the fire until it barely starts to pile over the top of your hole.  Let the flames die down a little bit then you will have a perfect cooking fire.  Because your fire is in a hole the dirt around it will harden up and insulate the heat and prevent the heat loss that you would have otherwise.  It also stops the problem that you would normally have if it’s windy (the heat gets blown away from the food and your food just sits there getting warm).  Once you are done cooking you can throw logs on top of your cooking fire and if your fire was built right than the basically solid mass of coals in your pit will engulf your log in flames. This is great when all you have left is large wood and its dark and your tire and just want to relax and fall asleep.

Continued Camping

I personally really like boots made by Merrill.  They are really comfortable and the majority of them are made to be waterproof.  If you buy them at a REI there is a 100% satisfaction guaranteed.  This means that if, and when the waterproofing in the boots fail you can return them and get a new pair.  The boots also have Vibram soles which absorb impact especially well as well as the fact that the boots have great traction.  They are great for just wa

lking around, trekking through snow covered trails, hunting, or a fall hike. 


                For those of you that will spending an extended amount of time in the outdoors and not going to be car camping it would be wise to use a backpack to bring your gear into camp.  There are two different types of backpacking backpacks, External Frame Packs and Internal Frame Packs.  The external frame packs are lighter than the internal frame [packs and can take a little bit more abuse.  I also believe that they are more comfortable than the internal frame packs because they pull the pack away from your back a good 2-3 inches.  This allows for air circulation and it gives you the ability to adjust the stiffness of the pack similar to how you adjust how stiff the seat is in a car.  Internal frame packs have the frame built into the pack.  This allowed the backpack to store easily because it can be more or less folded up.  

                                                                                                                                            Internal Below


External Above